How and Why You Should Sealcoat Your Asphalt Driveway
Asphalt driveways are a common feature in many homes, offering durability and a sleek appearance. However, like any outdoor surface, they require maintenance to remain in top condition. This is where driveway sealing comes into play. Sealing an asphalt driveway is not just about enhancing its appearance; it's a crucial protective measure. The benefits of sealing are manifold.
Firstly, driveway sealer acts as a barrier against elements such as water, oils, and UV rays, preventing cracking, fading, and other forms of weather-related damage. Secondly, driveway sealant extends the driveway's lifespan, saving homeowners from costly repairs or replacements. Regular sealing every two to three years can keep your asphalt driveway looking as good as new, boosting your home's curb appeal and value. Understanding these benefits is the first step in appreciating the importance of this seemingly mundane but essential maintenance task.
Picking the Right Sealcoating Material and Tools
Understanding what asphalt is and how it works is important to understanding what sealcoating is and how it works. Selecting the appropriate materials and tools is crucial for effective driveway sealing. The cost of an asphalt driveway is expensive, so you want to make sure it is properly maintained.
The market offers a variety of asphalt sealer types, each with its own set of characteristics and benefits. Acrylic-based driveway sealer, known for their color variety and UV resistance, are ideal for decorative purposes. Coal tar driveway sealer, while strong-smelling and more environmentally contentious, offer unparalleled protection against oil spills and harsh weather. Asphalt emulsion sealers are eco-friendlier and easier to apply but may require more frequent reapplication. And lastly, specifically designed for an asphalt driveway, the Advanced Formula J-16 sealer, seals asphalt driveways and makes your home look great.
In terms of tools, a high-quality sealant spreader or squeegee ensures even application, while a sturdy brush can handle edge work. Investing in the right materials and tools not only simplifies the process but also ensures a longer-lasting and more aesthetically pleasing finish.
We recommend our driveway sealer package. It comes with everything you need, five 5-gallon buckets of J-16 driveway sealer, 1-gallon jug of cold pour crack filler for any cracks, and a 2-in-1 brush/squeegee applicator. This is a truly one size fits all package that will have your driveway in tip-top shape!
How to Prepare Driveway for Sealcoating
The success of driveway seal coating largely depends on the preparation undertaken beforehand. Starting with a clean surface is crucial. The driveway should be thoroughly swept to and hosed down. Make sure to remove debris and then wash with a driveway cleaner or a simple solution of detergent and water to eliminate oil stains. For tough stains, a degreaser or a pressure washer may be necessary.
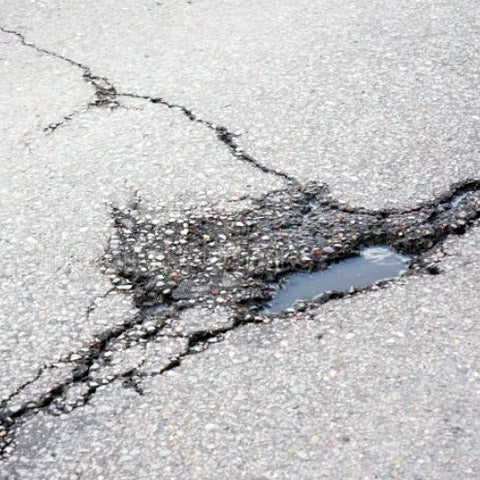
Next, inspect the driveway for cracks and fill them with a crack filler, in this case you will be using the Hyflex cold pour filler that is included with the driveway sealing package. This step prevents water infiltration and future damage. Allow the driveway to dry completely before applying the driveway sealer. These preparatory steps ensure that the sealer adheres properly and provides a smooth, uniform finish that lasts.
Step-by-Step Sealing Guide
From selecting the right driveway sealer, to prepping the asphalt, sealing your driveway is a straightforward process that can greatly extend its life and enhance its appearance. Here’s a detailed guide to help you through each step:
-
Choose the Right Day: Aim for a dry, warm day with a forecast clear of rain. Ideal temperatures are between 50 and 90 degrees Fahrenheit.
-
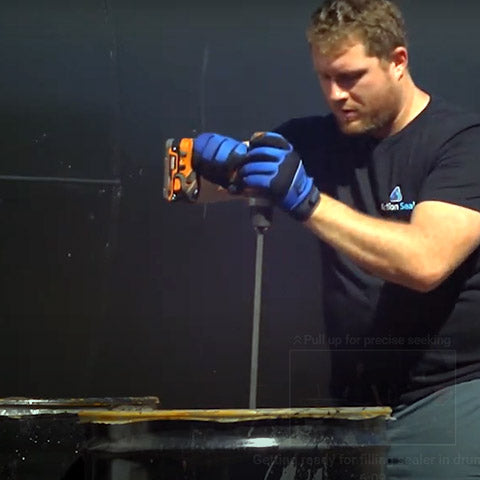
Mix the Sealer: Stir the driveway sealer thoroughly to ensure a consistent mixture, we recommend this asphalt sealer mixer. Some driveway sealers may require dilution, so follow the manufacturer's instructions carefully.
-
Section Your Driveway: Plan to work in small sections, allowing you to maintain a wet edge and avoid overlapping marks, until entire driveway is complete. Use tape on the edges, especially against the garage door, in the same way you would use masking tape when painting.
-
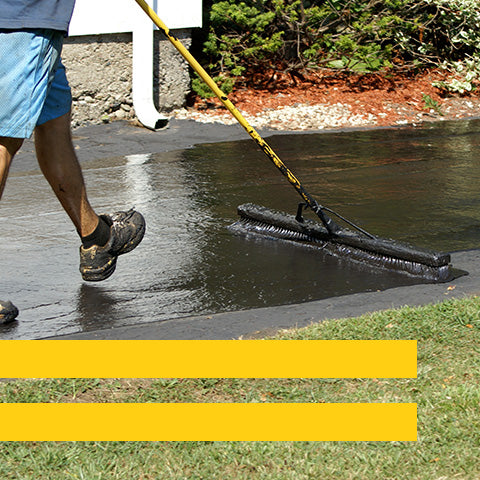
Apply the Sealer: Using your chosen tool, apply the sealer in thin, even coats. Start from one corner and work your way across in a smooth, sweeping motion. Be sure to feather the edges to avoid buildup.
-
Allow for Curing: People often ask us, "how long after sealing driveway can i drive on it? After sealing, keep the driveway free from vehicles and foot traffic for at least 48 hours. This allows the sealer to properly cure and set.
-
Inspect and Touch Up: Once dry, inspect your driveway for any missed spots or uneven areas. A second coat of asphalt driveway sealer may be necessary for optimal protection.
By following these steps, you can ensure a successful driveway sealing that not only protects but also revitalizes your asphalt surface. Remember, a little effort goes a long way in maintaining the longevity and beauty of your driveway.
5 Common Sealing Mistakes and How to Avoid Them
Even with the best intentions, mistakes can happen during driveway sealing. Being aware of these common pitfalls can help ensure a smooth and successful application:
-
Applying Driveway Sealer in Inappropriate Weather: Sealing in extremely hot or cold temperatures, or just before rain, can lead to poor adhesion and premature deterioration. Always check the weather forecast before starting.
-
Over or Under Application: Applying too much asphalt driveway sealer can lead to a slippery surface and longer drying times, while too little won't offer adequate protection. Aim for a thin, even coat.
-
Ignoring Cracks and Holes: Failing to repair cracks and holes before applying asphalt driveway sealer can undermine the process. Ensure all repairs are made before applying the sealer.
-
Sealing a Dirty Driveway: Dirt and debris can prevent the asphalt driveway sealer from adhering properly. Thoroughly clean the driveway and remove oil and gas stains before sealing.
-
Not Allowing Enough Drying Time: Rushing the curing process by using the driveway too soon can ruin the sealer's effectiveness. Allow at least 24 hours for the sealer to dry.
By avoiding these common errors, you can achieve a professional-looking finish that will last for years.
Conclusion - Post-Sealing Insights
Once the sealing process is complete, it's important to reflect on the value it adds to your property. A well-sealed driveway not only enhances your home's curb appeal but also provides long-term protection against the elements, reducing the likelihood of costly repairs. Regular maintenance, including resealing every two to three years, can significantly extend the lifespan of your asphalt driveway. The effort put into sealing reaps rewards in both the driveway's appearance and integrity, making it a wise investment for any homeowner. Remember, the key to a durable, beautiful driveway lies in regular, careful maintenance.